Rich Text Animation options
Get to know the animation options for the rich text element.
Here we’ll discuss the different animation options available for the Rich Text element. Be sure to also have a look at the Animation Basics to learn more about our general Entry, Exit and Change animations.
In order to learn about other design options for the Rich Text element, head over to the dedicated Docs page.
After selecting a Rich Text element on the Editor, you’ll find the animation options on the Animation tab of the right toolbar.
Line by Line animations
With Line by Line animations, you can specify that the each line of the text element should be animated individually. While presenting, only the first line will be animated at the beginning. After clicking (or pressing the Arrow-Right key), the next line will be animated.
Like this you can e.g. animate item after item in a bullet-point list without creating several Slides, like you know from other presentation software like PowerPoint.
You can still choose from one of the Transition Types to specify how each line should be animated.
Video showcasing the Line-by-Line animations
At the moment, line by line animations aren’t support for video exports. There all lines will be animated at once.
Highlight last line
There’s also an additional option for Line by Line animations called “Highlight last line”. With this enabled, only the last item will be highlighted and the previous list items will be grayed out.
Video showcasing the Highlight last line option
Text Change Transitions
snappify provides you different Transition types to animate text changes between Slides.
Transition Types
Let’s have a look at the different transition types for text changes:
FadeIn
With this transition type, new text changes will fade in and text that doesn’t exist anymore will disappear gradually.
Video showcasing the FadeIn transition
SlideIn
This transition type listens to whole line changes. Changed and new lines will slide in from the right and the old lines will slide out to the left.
Video showing the SlideIn transition
Morph
This transition type can be used to visualize text changes smoothly. It will morph the old text into the new text, moving keywords and identifiers to their new position.
Video showcasing the Morph Transition
TypeWriter
The TypeWriter effect will type out the text, character by character.
Video showcasing the TypeWriter transition
None
Of course you can also disable the animation completely. By choosing the Transition type None, the text will simply change without any animation.
Duration & Delay
Per default, text changes will start playing together with the transition of the corresponding Rich Text element and the animation will also have the same duration.
If you want to change that, you also have the option to set a custom duration and delay for the text change animation.
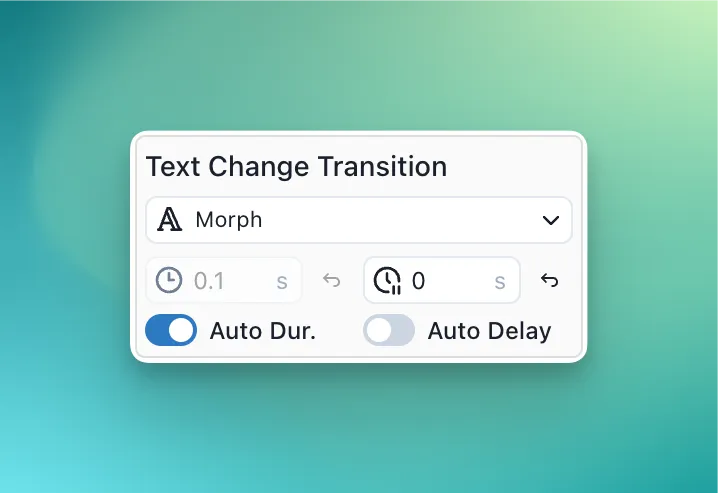
Auto Duration
With Auto Duration enabled, the duration of the text change will be the same as for the parent element. Except for the TypeWriter effect, there you also have to define the duration per character.
Auto Delay
With Auto Delay enabled, the text change transition will wait for the Rich Text element to finish its transition before starting to play.